
If you have just purchasedyour first soldering iron, the excitement of diving straight into your first electronic project is completely understandable. But before you even think about connecting a single wire or forming your first joint, there is one fundamental step you absolutely cannot skip: tin the tip.
This guide will walk you through the entire process — from understanding why tinning matters to the exact technique that will keep your soldering iron tip in perfect condition for years to come.
What Does It Mean to „Tin the Tip“?
Tinning simply means covering the tip of the soldering iron with a fresh, thin layer of solder. The word itself comes from the element tin, which is one of the primary metals found in solder wire.
When you tin the tip, you are essentially creating a protective coating over the working surface underneath. This barrier is what makes the difference between a tip that performs beautifully and one that fails within its first few uses. A well-tinned tip appears shiny and silver — that glossy finish is your best indicator of a healthy, well-maintained iron.
Why Is Tinning So Important?
The science behind tinning is straightforward. A bare soldering iron tip is typically made from a copper core, coated sequentially with an iron plating layer, a nickel layer, and a chrome layer applied only to the non-working areas of the shank. The iron plating layer forms the primary working surface and is the layer most susceptible to erosion during use. When that surface is exposed to high temperatures and open air simultaneously,oxidationsets in rapidly. Oxidation is the same chemical reaction that causesmetal corrosion— only here, it produces a black, non-wettable layer that is devastating to soldering performance.
Here is what that oxidation actually costs you:
- Heat Transfer: A black, oxidized tip insulates rather than conducts, meaning heat cannot flow properly from the iron to your solder and components.
- Life of the Tip: Without a protective solder coating, the tip’s iron-plated working surface degrades rapidly, especially at higher temperatures.
- Soldering Quality: Contaminated tips cause cold, dull joints rather than clean, shiny ones — a serious problem for any electronic work.
Tinning solves all of these issues in one simple step by sealing the iron-plated working surface away from oxygen entirely.
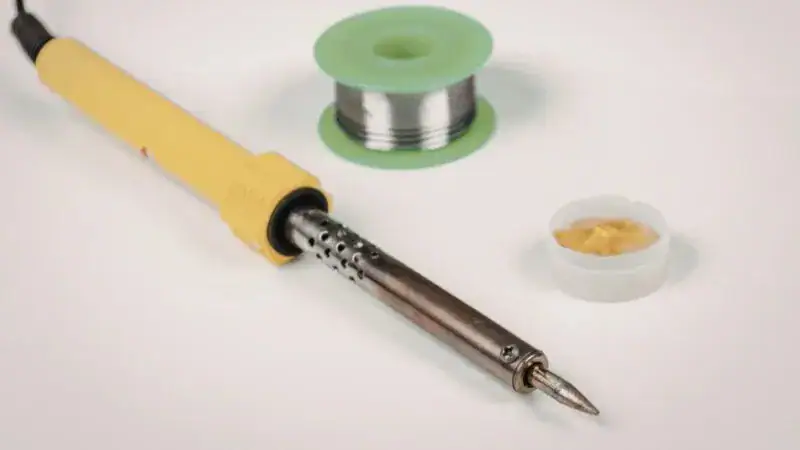
What You Will Need
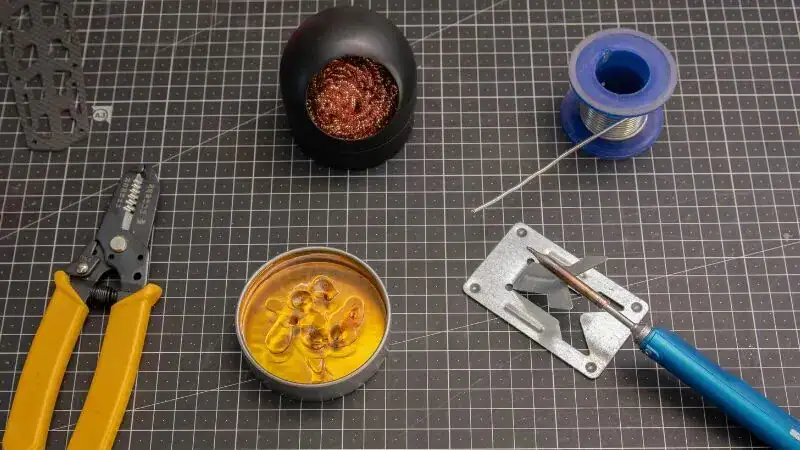
Gathering the right materials before you begin makes the entire process smoother and safer:
- Soldering Iron: Any iron with a stable soldering temperature control will do.
- Solder: A rosin-core solder(60/40 tin-lead or lead-free) works best. The rosin core contains built-in flux that assists in bonding.
- Flux: A small pot of additional flux paste is excellent for ensuring the solder bonds cleanly to the surface without contaminant interference.
- Damp Sponge or Tip Cleaner: A brass wool tip cleaneris the preferred choice, as it cleans without causing thermal shock to the plating. If using a damp cellulose sponge, wring it out to a semi-dry state — an overly wet sponge can cause thermal shock that cracks the tip’s plating.
- Safety Gear: Glasses and proper ventilation are non-negotiable when working with hot solder.
Step-by-Step: Tinning Your Soldering Iron for the First Time
Step 1 — Prepare Everything Before Heating
Set up your workspace carefully before you apply any heat. Place the iron securely in its stand, have your solder unspooled and within arm’s reach, and make sure your damp sponge or tip cleaner is ready. The reason for this preparation is critical: once the tip becomes hot, you have only a very short window before oxidation begins on a bare tip. There is no time to search for materials.
Step 2 — Heat the Iron to the Correct Soldering Temperature
For traditional 60/40 tin-lead solder, set your iron to a moderate temperature — ideally between300°C and 350°C (572°F to 662°F). If you are using lead-free solder (such as SAC305), a higher temperature of around350°C to 380°C (662°F to 716°F) is typically required to achieve proper wetting and joint quality. Resist the temptation to push it beyond the recommended range. Running your iron at higher temperatures than necessary dramatically accelerates oxidation and shortens the life of the tip.
As the iron heats up, watch the tip of the soldering iron closely. You may notice a faint discoloration beginning — this is the early sign of oxidation starting, and it is your cue to act quickly.
Step 3 — Apply Solder Immediately
The moment the tip is hot enough to melt solder — the exact time varies depending on your iron’s wattage and power; a high-wattage station may be ready in under a minute, while a low-power iron may take longer — quickly wipe it with brass wool or a damp sponge to remove any light oxidation or residue. Then immediately feed solder onto the working surface of the tip before fresh oxidation can form. Rotate it slightly so that the covering is even and complete. Do not just touch the very end; work the solder around the full functional area of the bit.
The flux inside the rosin-core solder will activate at temperature, fizzing slightly as it chemically reduces any minor surface oxides that may have formed during heating. This is completely normal. You should see the liquid solder cling to the tip and form a bright, shiny mirror-like coating almost immediately.Pro Tip:If your solder beads up and will not melt or stick at all, apply a small dab offlux pastedirectly to the tip first. The flux acts as a chemical cleaner that removes invisible oxidation and helps the solder bond properly to the surface.
Step 4 — Wipe the Tip and Re-Tin
Once the entire functional surface is coated, gently press the tip into the brass wool tip cleaner. This removes excess solder, burned flux residue, and any remaining contaminant.
Immediately after wiping — and this is crucial — apply a fresh, thin layer of solder to re-tin the surface. This two-stage process of wipe-then-re-tin is the foundation of proper tip care and should become second nature every time you pick up your iron.
After re-tin, inspect the tip. It should look uniformly bright silver and shiny across its entire surface. If any black spots remain, repeat the wipe and re-tin cycle until the surface is completely clean.
Step 5 — You’re Ready to Solder
With a perfectly tinned, shiny tip, your iron is now ready to make clean, quality solder joints. The effective heat transfer between the tip and your components will be immediately noticeable — solder will flow smoothly and quickly rather than rolling off or clumping.
Ongoing Tip Care: Making Tinning a Habit
The first tinning is just the beginning. Proper long-term tip care is what keeps your iron in reliable service for years.
- The „Always Wet“ Rule is the golden principle:the tip should never be bare and hot at the same time. Every time you set the iron down in its stand between joints, wipe the tip clean and immediately apply a fresh bead of solder. This constant covering prevents atmospheric oxygen from reaching the iron-plated working surface.
- During a Soldering Session:Between each joint, a quick clean on the brass wool tip cleaner followed by immediate re-tinning keeps the surface in perfect working condition.
- At the End of Each Session: Before you unplug your iron, apply a large, generous layer of solder to the tip. This thick protective blob is your iron’s shield during storage — it prevents oxidation from setting in while the tip cools down and sits unused.
Troubleshooting: When the Solder Won’t Stick
If you encounter a situation where solder refuses to melt onto the tip or beads up and rolls off, you are dealing with heavy oxidation. This is a common problem, especially on older irons or tips that were left bare and hot for extended periods.
Here is an effective recovery process:
- Apply a generous amount of flux paste directly to the tip.
- At a moderate soldering temperature, press the tip firmly into brass wool tip cleaner and work it around gently to remove the black oxide crust.
- Immediately apply solder to re-tin while the flux is still active and the tip is clean.
- Wipe the tip on the brass wool cleaner and re-tin one final time to seal.
If the oxidation is too severe and this process does not restore a shiny surface, a commercial tip cleaner paste can chemically dissolve the oxide layer — a last resort but a highly effective one.